Guide
How to Use a Wine Making Kit, Step by Step
A 6 gallon kit makes thirty bottles of drinkable wine in six weeks. The instructions in the box are right; the three things they understate are what decide the result.
The short answer
Ferment the kit in a primary bucket for five to seven days until gravity reaches about 1.010, rack to a carboy for secondary, then degas, add the fining agents in the order supplied, let it clear for two to four weeks and bottle. The three things that ruin kit wine are bottling early, degassing badly and leaving headspace in the carboy.
DisclosureWe earn a commission on qualifying purchases made through links on this page, at no extra cost to you. It does not change what we recommend or how we rank it -- here is how we pick and here is the full disclosure.
The kit timeline
| Stage | Vessel | Target gravity | Typical duration |
|---|---|---|---|
| Primary fermentation | Bucket, lid on loosely | 1.090 down to ~1.010 | 5-7 days |
| Secondary fermentation | Carboy with airlock | ~1.010 to 0.996 or below | 10-14 days |
| Degas and fine | Carboy | Stable, terminal | 1-2 days of work |
| Clearing | Carboy, topped up | Unchanged | 2-4 weeks |
| Bottle and age | Bottles | Unchanged | 3-12 months |
Before you start
Sanitize everything, and read the whole leaflet
Wine kits are forgiving about most things and unforgiving about sanitation. Everything that touches the juice after the initial mixing needs to be sanitized: the bucket, the lid, the spoon, the siphon, the carboy, the bung, the airlock, the hydrometer and the test jar. Clean first with an alkaline wash, then sanitize with a no-rinse sanitizer.
Then read the entire instruction leaflet before day one, not stage by stage. Kits differ in the order of their additives -- some add oak at secondary, some at primary, some stagger the fining agents across several days -- and discovering on day twenty that you were supposed to have done something on day fourteen is the most common avoidable problem.
The equipment list is short and mostly shared with beer brewing. If you already brew you likely own all of it except the corker. The full list is in wine making equipment list.
Step 1
Primary fermentation in the bucket, 5 to 7 days
- Mix the juice with water to the volume the kit specifies, usually six gallons, in the primary bucket. Warm water helps the concentrate dissolve and gets the batch to pitching temperature.
- Take and record the starting gravity. Most kits start somewhere around 1.080 to 1.095. You need this number to calculate the alcohol later -- the arithmetic is in how to calculate ABV.
- Add the additives in the order the kit lists them, then pitch the yeast on the surface without stirring it in.
- Cover with the lid resting on, not sealed. Primary fermentation produces a lot of CO2 and benefits from some air exchange. A sealed bucket at this stage will lift its own lid.
Hold the primary between 68 and 75 F. Wine yeast is tolerant but not indifferent: too cold and it stalls, too warm and you get hot, solventy notes. A wrap heater and a controller handle a cold room -- see fermentation heaters.
Rack to the carboy when gravity reaches about 1.010, which usually takes five to seven days. Do not wait for the airlock to stop bubbling; go by the hydrometer.
Step 2
Secondary fermentation, and the headspace rule
Siphon into the carboy, leaving the gross lees behind. From this point the relationship with oxygen inverts completely: in primary a little air helped the yeast, and from here air is the enemy. Wine oxidizes far more readily than beer, and oxidized wine tastes flat, sherry-like and brownish.
That is why the headspace rule matters so much. A carboy should be filled to the base of the neck, not half way up the shoulder. If the batch does not quite fill it, top up -- with a similar commercial wine, with sanitized water if you must accept the dilution, or with sterile marbles to displace volume. A carboy with three inches of air above the wine for a month will oxidize.
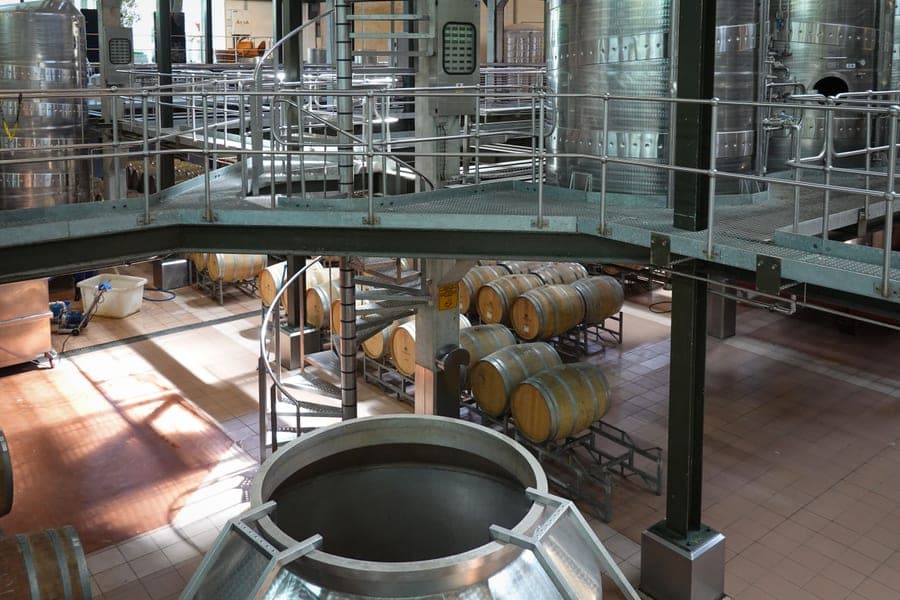
This single problem is what the variable-capacity stainless tank exists to solve: its floating lid drops to the wine line so there is no headspace to fill. For a first kit it is overkill, but it is the reason those tanks look so appealing on your third batch -- see best wine fermenters.
Step 3
Degassing, which the instructions understate
When fermentation is finished -- gravity at or below 0.996 and stable across two readings days apart -- the wine is saturated with dissolved CO2. Degassing removes it, and it is the stage most often done badly.
It matters for two reasons. A wine still holding CO2 tastes spritzy and slightly sharp in a way that reads as a fault in a still wine. More importantly, dissolved gas prevents the fining agents from working: fining relies on fine particles aggregating and falling, and a constant upward drift of tiny bubbles keeps them in suspension. Wine that will not clear is very often wine that was not degassed.
- Bring the wine to room temperature first. Cold wine holds CO2 much more stubbornly. Degassing at 50 F is largely wasted effort.
- Use a degassing paddle on a drill at low speed, or stir vigorously by hand for considerably longer than feels necessary. Expect foam. Stop when stirring stops producing a fresh surge of bubbles.
- Do it in stages. Stir, wait an hour, stir again. Gas continues to come out of solution between sessions, and two moderate passes beat one frantic one.
Step 4
Fining, clearing and when to bottle
Add the fining agents in the order and at the intervals the kit specifies. Most kits supply two: a negatively charged agent and a positively charged one, and the sequence matters because they work by attracting opposite charges on suspended particles. Adding them together or in the wrong order wastes both.
Then leave it alone. Two to four weeks in a cool, dark place, topped up, with the airlock full. Clearing is a passive process and the only thing that speeds it up is time and stillness. Moving the carboy, or racking repeatedly to check, puts particles back into suspension.
Bottle when the wine is genuinely clear -- you should be able to read print through the carboy -- and not before. Bottling cloudy wine does not produce clear wine in the bottle; it produces thirty bottles with sediment in them. This is the single most common reason a kit wine disappoints, and the fix costs nothing but patience.
After bottling
How long before it is good
Kit wine is drinkable at bottling and considerably better three months later. White wines and lighter reds come round in two to three months. Full-bodied reds -- amarone-style kits especially -- genuinely need six to twelve months, and tasting one at week two will tell you nothing useful except that it is young.
Store bottles on their side in a cool, dark, stable place. Temperature swings are worse than a steady temperature that is slightly too warm, because they drive the cork in and out microscopically and pull air in with it.
Open one bottle a month and write down what you taste. That record is what turns the next kit from a repeat into an improvement, and it is the single habit that separates people who make good kit wine from people who make the same kit wine repeatedly.
Where this came from
The basis for this
Kit composition, batch volumes and equipment contents are the manufacturers' published specifications for the products named above. The sequence, gravity targets and timings reflect standard wine kit instructions and long-standing home winemaking practice rather than a single manufacturer's leaflet -- always follow the specific additive order supplied with your kit. See how we pick.
What we recommend
The products on this page
The kit this guide assumes
Mid tier
RJS Craft Winemaking Kit
RJS Craft Winemaking
Six gallons of juice or concentrate with yeast, additives and fining agents included, across tiers where juice content rises with the tier -- which is the single biggest driver of how good the finished wine is.
Spec sheet
- Batch size
- 6 gal / ~30 bottles
- Varietals
- Chardonnay, pinot noir, viognier, amarone and more
- Tiers
- Multiple tiers; juice content rises with tier
- Time
- 4-8 weeks to bottle, months to peak
- Includes
- Juice, yeast, additives, fining agents
- Equipment
- Not included -- needs a fermenter and carboy
What it is not good at
Equipment is not included, and the lower tiers are concentrate-heavy, which shows up as a thinner wine no technique can fully rescue.
Who it is for
A 6 gallon varietal batch of around 30 bottles
What you need alongside it
Entry tier
Complete Wine Making Equipment Kit
Midwest / Northern Brewer
A food-grade primary bucket with a lid and airlock grommet, a 6 gallon carboy for secondary, an auto-siphon and tubing, and a hydrometer with a test jar -- which is the complete list for the sequence below.
Spec sheet
- Batch size
- 6 gal
- Primary
- Food-grade bucket with a lid and airlock grommet
- Secondary
- 6 gal glass or PET carboy
- Transfer
- Auto-siphon and tubing
- Measurement
- Hydrometer and test jar
- Not included
- The wine kit itself, and usually a corker
What it is not good at
Does not include the wine kit itself, and usually not a corker, which you will need on bottling day.
Who it is for
A first winemaking setup
Best for the bulk aging stage
Entry tier
Glass Demijohn 5-6 Gallon
Various
Five to six gallons of fully oxygen-impermeable glass with a narrow neck for a bung and airlock, which is what you want if the wine is going to sit for three months rather than three weeks.
Spec sheet
- Capacity
- 5-6 gal (smaller sizes common in Europe)
- Material
- Glass -- fully oxygen-impermeable
- Neck
- Narrow, takes a #6.5 or #7 bung
- Cleaning
- Needs a carboy brush; no wide access
- Weight
- Heavy full; use a milk-crate carrier
- Best for
- Long bulk aging where oxygen is the enemy
What it is not good at
Heavy when full and needs a carboy brush to clean, because there is no wide access.
Who it is for
Holding wine for months before bottling
FAQ
Questions brewers actually ask
How long does a wine kit take from start to bottle?
Around six weeks: five to seven days of primary fermentation in a bucket, ten to fourteen days of secondary in a carboy, a day or two of degassing and fining, then two to four weeks of clearing before bottling. It is drinkable at bottling and noticeably better after three months in the bottle.
When should I rack a wine kit from primary to secondary?
When the gravity reaches about 1.010, which usually takes five to seven days. Judge it with a hydrometer rather than by whether the airlock is still bubbling -- airlock activity depends on how well the bung is seated as much as on fermentation, and it is a poor signal.
Why won't my kit wine clear?
Most often because it was not degassed properly. Dissolved CO2 keeps rising through the wine as fine bubbles, and that constant upward drift keeps the particles the fining agents are trying to drop in suspension. Degas at room temperature, in stages, until stirring no longer produces a fresh surge of bubbles.
Does headspace in the carboy matter for wine?
Far more than it does for beer. Wine oxidizes readily, and oxidized wine tastes flat and sherry-like. Fill the carboy to the base of the neck. If the batch is short, top up with a similar commercial wine, with sanitized water accepting the dilution, or displace the volume with sterile marbles.
Can I bottle a wine kit early if it tastes fine?
You can, and it is the most common way to spoil a good batch. If the wine is not clear in the carboy it will not become clear in the bottle -- you will simply have thirty bottles with sediment in them. Wait until you can read print through the glass.
Read next
More on wine & mead
Roundup
The Best Wine Fermenters
Variable-capacity tanks, carboys and primaries, judged on headspace control.
Comparison
Demijohn vs Carboy
The terminology settled, then the glass-versus-PET decision that matters.
Comparison
Mead vs Wine: Which to Make First
Cost, difficulty and time compared, and which suits a beer brewer first.