Guide
How to Mill Grain for Beer
Low speed, measured gap, and intact husks. Here is how to tell a good crush by looking at it.
The short answer
Set the gap with a feeler gauge, run the mill slowly -- hand crank or a drill in low gear under 500 rpm -- and judge the result by looking for intact husks with the starchy endosperm broken into grits rather than flour. Fast drill speeds shatter grain and cause stuck mashes.
DisclosureWe earn a commission on qualifying purchases made through links on this page, at no extra cost to you. It does not change what we recommend or how we rank it -- here is how we pick and here is the full disclosure.
Step 1
Set the gap with a feeler gauge, not the dial
Dial markings and detents on mills are indicative rather than accurate, particularly on budget models. Since the entire point of owning a mill is controlling a number precisely, measure it.
- Get an automotive feeler gauge set. They cost very little and have leaves in thousandths of an inch.
- Slide the leaf you want between the rollers and adjust until it is a firm but sliding fit.
- Check both ends. If your mill only adjusts at one end, the gap will be wedge-shaped and one side over-crushes while the other under-crushes.
- Mark or note the setting so you can return to it.
Start at 0.035 inches if you are unsure. The numbers for different processes are in grain mill gap settings.
Step 2
Run it slowly. This is the big one.
The most common mistake in milling, and the one that causes stuck mashes and poor efficiency, is speed. A cordless drill at full speed spins mill rollers far faster than they are designed to turn, and the result is grain that gets shattered rather than crushed: flour instead of grits, and husk destroyed rather than opened.
- Hand crank is the gold standard. Ten to fifteen pounds is a few minutes of mild effort, and the speed is naturally low.
- Drill in low gear, well under 500 rpm. Feather the trigger rather than holding it wide open. It should sound like grinding, not screaming.
- Never an impact driver. It is the wrong tool in every respect.
- A geared motor if you mill in bulk. A slow, torquey motor is the right permanent answer and is the setup serious millers build.
Step 3
Judge the crush by looking at it
You do not need instruments. Take a handful from the bucket and look:
What you want to see
| Component | Good crush | Bad crush |
|---|---|---|
| Husks | Mostly intact, split open | Shredded into fragments |
| Endosperm | Broken into coarse grits | Powdered into flour |
| Whole kernels | Very few | Many -- gap too wide |
| Flour content | A little dust | Visible flour, clumps when squeezed |
| Feel | Gritty, like coarse semolina | Powdery or doughy |
An orange rule marks the better of the two on that row.
The target is simple to state: husks intact, endosperm broken. The husk is the filter bed your wort will drain through; the endosperm is what the enzymes need access to. A good crush separates the two without destroying either.
If you see lots of whole kernels, tighten the gap. If you see flour and shredded husk, either widen the gap or -- more likely -- slow the mill down.
Step 4
Consider conditioning the malt
A technique worth knowing, and genuinely useful for anyone milling tight. Conditioning means lightly misting the grain with water -- roughly 1 to 2 percent by weight -- and letting it rest for ten to twenty minutes before milling.
The water is absorbed by the husk, which is thin and permeable, and barely penetrates the endosperm in that time. A damp husk is pliable rather than brittle, so it survives the nip intact while the dry interior still shatters normally.
- Mist, do not soak. A spray bottle and a stir. Grain should look slightly dull, not wet.
- Rest 10 to 20 minutes, stirring once. Longer and moisture reaches the endosperm, which makes it gummy rather than brittle.
- Mill immediately after the rest. Do not store conditioned grain -- damp malt spoils.
- Expect the mill to work harder. Pliable husk grips more. Run slower still.
Step 5
Mill fresh, and mill into something sensible
Crushed malt starts losing aroma within days and is noticeably stale within weeks, because you have broken the husk that was protecting it. That is half the reason to own a mill: buy whole grain in sacks, mill on brew day.
- Mill into a bucket with a lid, or straight into your mash tun. Not into an open tub in a dusty garage.
- Expect dust. Milling throws fine flour into the air. Mill outdoors or in a space you do not mind dusting, and consider a mask if you mill large quantities.
- Store whole grain cool, dry and sealed. Whole malt keeps for a year or more; crushed malt does not keep at all.
- Weigh before milling, not after. Some dust is always lost.
What we recommend
The products on this page
The mill
Mid tier
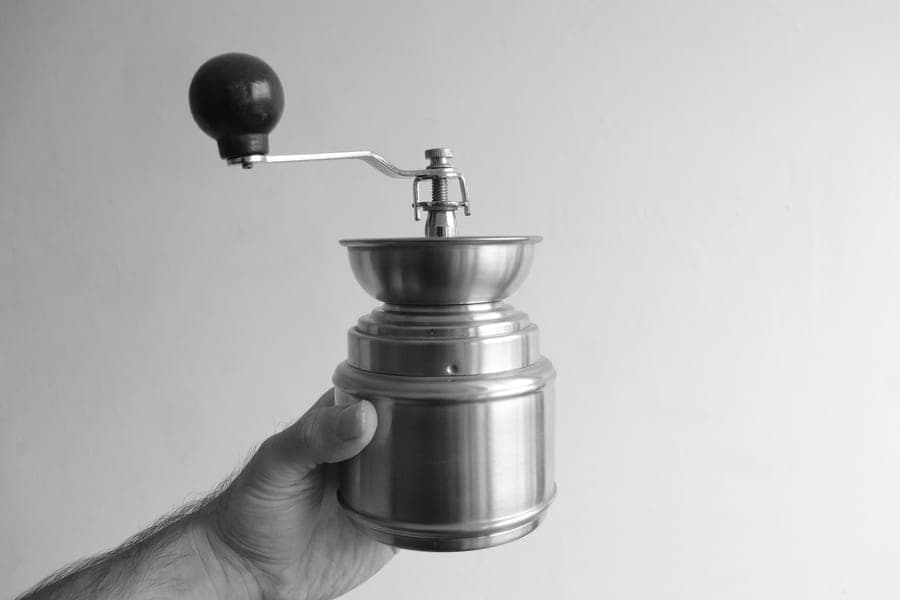
Monster Mill MM2 Two-Roller Grain Mill
Monster Brewing Hardware
Two 1.5 inch knurled rollers with gap adjustment at both ends. Large rollers grip and pull grain rather than letting it skate, which is what separates a mill that works from one that stalls.
Spec sheet
- Rollers
- Two, 1.5 in diameter, knurled
- Gap
- Adjustable on both ends, 0.015-0.070 in
- Drive
- Hand crank or drill at reduced speed
- Build
- Steel, made in USA
- Throughput
- Slower per pound than the MM3
- Best for
- Most homebrewers; the MM3 is for volume
What it is not good at
Hopper usually separate. Hand crank unless you fit a drill in low gear.
Who it is for
Most homebrewers

What your crush has to work with
Entry tier
Stainless Domed False Bottom
Various
A domed perforated plate relies on intact husk to form a filter bed. Shred the husk and the best false bottom in the world will not drain.
Spec sheet
- Material
- Perforated 304 stainless
- Perforation
- Typically 1-2 mm holes
- Shape
- Domed -- resists collapse under grain weight
- Sizing
- Must match the vessel's internal diameter
- Connection
- Silicone tube to the pickup, or a center fitting
- Dead space
- Domed designs trap less wort than flat plates
What it is not good at
Must match the vessel's internal diameter.
Who it is for
Draining wort off the bed you just created

Value alternative
Mid tier
Cereal Killer Grain Mill
Adventures in Homebrewing
0.025 to 0.1 inch adjustable gap with a 7 lb hopper in the box, which saves a separate purchase.
Spec sheet
- Rollers
- 2, 1.25 in diameter
- Gap
- 0.025-0.1 in adjustable
- Hopper
- 7 lb included
What it is not good at
Smaller rollers and looser gap tolerance -- verify with a feeler gauge.
Who it is for
Brewers who want a hopper included
FAQ
Questions brewers actually ask
How do you mill grain for brewing?
Set the roller gap with a feeler gauge at both ends, starting around 0.035 inches, then run the mill slowly -- hand crank or a drill in low gear under 500 rpm. Judge the result by eye: you want husks mostly intact and split open, with the starchy endosperm broken into coarse grits rather than powdered into flour.
Can you mill grain with a drill?
In low gear, well under 500 rpm, feathering the trigger. At full speed a drill spins the rollers far faster than they are designed to turn, which shatters grain into flour and destroys the husk that should form your filter bed, causing stuck mashes. Never use an impact driver. A geared motor is the right permanent solution if you mill in bulk.
What does a good grain crush look like?
Husks mostly intact and split open rather than shredded, and the starchy endosperm broken into coarse grits with only a little dust. It should feel gritty, like coarse semolina, not powdery or doughy. Lots of whole kernels means the gap is too wide; visible flour and shredded husk means either too tight or, more often, too fast.
What is malt conditioning?
Lightly misting grain with water -- around 1 to 2 percent by weight -- and resting it for ten to twenty minutes before milling. The thin husk absorbs the moisture and becomes pliable, so it survives the crush intact, while the endosperm stays dry and brittle enough to shatter normally. Most useful for tight crushes and fly sparging.
Should I mill grain in advance?
No. Crushed malt starts losing aroma within days and is noticeably stale within weeks, because milling breaks the husk that was protecting the interior. That is half the point of owning a mill: buy whole grain in sacks, which keeps for a year or more, and mill on brew day.
Read next
More on brew day gear
Roundup
The Best Grain Mills for Homebrewing
Grain mills compared on rollers, gap adjustment and build quality.
Comparison
Two Roller vs Three Roller Grain Mill
Crush quality, husk integrity and throughput, and when the third roller pays.
Comparison
Mash Tun vs Lauter Tun
What each vessel does, and why homebrewers combine the two functions.
Guide
False Bottoms Explained
What a false bottom does, domed versus flat, dead space, and the alternatives.